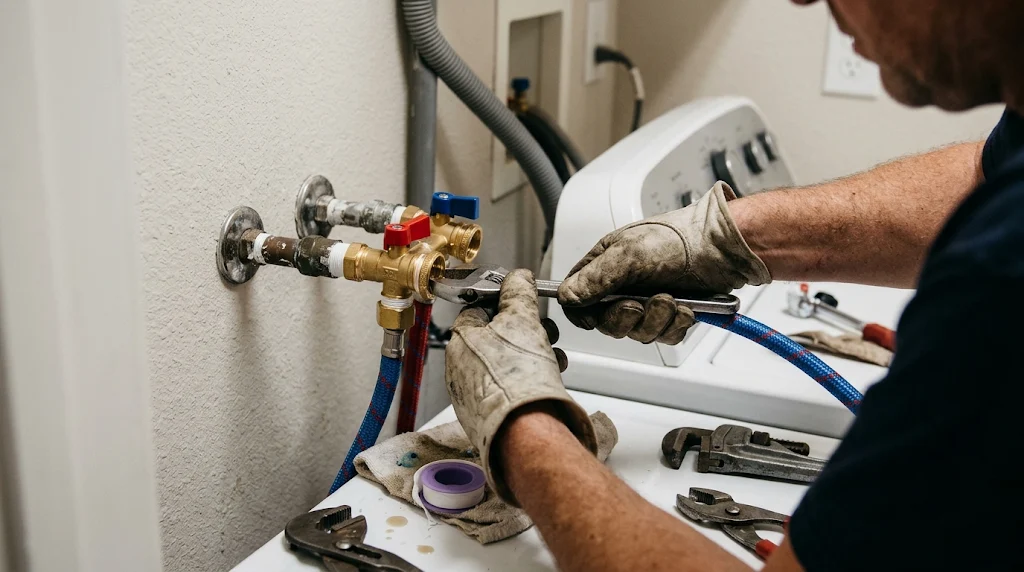
A washing machine that refuses to fill, fills too slowly, or continues taking in water when it should be off may have a problem with its water inlet valve. This small but important component controls how water enters the appliance during different wash cycles.
Understanding when washing machine valve replacement is necessary can help homeowners avoid unnecessary repairs and prevent water-related damage. However, a faulty inlet valve is not always the reason a washer stops filling. Clogged filters, restricted hoses, closed supply taps, and electrical problems can produce similar symptoms.
In this guide, you will learn how a washing machine water inlet valve works, how to recognize common warning signs, what to check before replacing it, and how the replacement process generally works.
Whether you own a front-load or top-load washing machine, the most important step is identifying the correct replacement part for your specific appliance model.
What Is a Washing Machine Water Inlet Valve?
A washing machine water inlet valve is an electrically controlled component that regulates the flow of water into the appliance. It opens when the washing machine’s control system requests water and closes when the required water flow is stopped.
Depending on the appliance, the valve may have one or multiple electrical solenoids and water outlets.
Many traditional washers have separate hot and cold water connections. Some newer models use different configurations, including a single cold-water connection.
The inlet valve also helps direct water toward the appropriate dispenser compartments, depending on the washing machine design.
Water Inlet Valve vs. Water Shut-Off Valve
These two components are often confused, but they perform different functions.
| Feature | Water Inlet Valve | Water Shut-Off Valve |
|---|---|---|
| Location | Inside the washing machine | On the wall behind the washer |
| Main function | Controls water entering the appliance | Stops household water supply |
| Operation | Electrically controlled | Usually manually operated |
| Common problem | Washer fails to fill or overfills | Water supply cannot be stopped properly |
| Replacement | Appliance repair | Plumbing repair |
If the problem involves the wall-mounted supply valve, you may need a qualified plumber rather than an appliance repair technician.
7 Common Signs You Need Washing Machine Valve Replacement
A damaged inlet valve can affect normal washing machine operation in several ways. However, these symptoms should be treated as warning signs rather than automatic proof that the valve has failed.
1. Washing Machine Is Not Filling With Water
One of the most recognizable symptoms is a washer that starts a cycle but does not receive water.
You may hear the machine operating, but the drum remains dry or the cycle stops with a water-supply error.
Possible causes include:
- A damaged inlet valve solenoid.
- A blocked inlet filter screen.
- A closed household water supply valve.
- A restricted water supply hose.
- An electrical connection problem.
Before replacing the inlet valve, confirm that the household water supply is working and the hoses are connected correctly.
2. Washing Machine Fills Very Slowly
Slow filling can make an ordinary wash cycle take considerably longer.
A partially blocked inlet screen may prevent sufficient water from entering the machine. Sediment, mineral deposits, and debris can accumulate around the screen over time.
A worn or damaged valve may also restrict water flow.
Start by inspecting the accessible inlet screens and hoses. Cleaning a clogged screen may solve the problem without replacing the entire valve.
3. Water Continues Entering When the Machine Is Off
If water continues entering the drum after the washing machine has been switched off, the inlet valve may be mechanically stuck open.
This can happen when debris prevents the valve from closing properly or an internal component becomes damaged.
For safety, turn off the wall-mounted water supply immediately.
If water continues entering even when the appliance is unplugged, stop using the washer until the problem is properly diagnosed.
4. Water Leaks Around the Back of the Washer
A leak near the rear of the washing machine may indicate a problem with the inlet valve or its connections.
Common possibilities include:
- A cracked valve housing.
- A loose water hose connection.
- A damaged hose washer.
- A deteriorated internal hose.
- A leaking wall-mounted shut-off valve.
Do not assume every rear leak requires a new inlet valve. Identify where the water originates before ordering replacement parts.
5. Washing Machine Overfills
An appliance that receives more water than expected may have a valve that is not closing correctly.
However, overfilling can also result from a faulty water-level pressure sensor, pressure hose, or electronic control system.
If the water level rises unexpectedly, stop the cycle and shut off the water supply. Arrange a proper inspection before using the machine again.
6. Certain Wash Cycles Do Not Receive Water
Some washing machines use multiple solenoids or outlets to direct water into different detergent compartments.
If one section of the valve assembly fails, the appliance may receive water during one stage but not another.
For example, the machine may fill normally during the main wash but fail to supply water to a particular dispenser compartment.
The correct diagnosis depends on the appliance’s design and service instructions.
7. Repeated Water Supply Error Codes
Some washers display an error code when they cannot receive water within the expected operating conditions.
A water-supply error does not necessarily mean the inlet valve needs replacement.
Check your owner’s manual to identify the exact error code and recommended troubleshooting procedure. Different manufacturers use different codes and diagnostic systems.
What to Check Before Replacing a Washing Machine Valve
Before purchasing a replacement component, perform a few basic checks.
These inspections may help identify a simpler problem.
Check the Household Water Supply
Make sure the hot and cold water supply valves are fully open when your washing machine requires both connections.
A partially closed supply valve can restrict water flow and cause slow filling.
If the household water supply is interrupted, repairing the washing machine will not solve the problem.
Inspect the Water Inlet Hoses
Examine the hoses connecting the washer to the household water supply.
Look for:
- Kinks or sharp bends.
- Cracks or visible damage.
- Loose connections.
- Signs of corrosion.
- Restricted water flow.
Replace damaged hoses with compatible products recommended for your appliance.
Clean the Inlet Filter Screens
Small mesh screens inside the water inlet connections help catch debris before it enters the washing machine.
To inspect them:
- Unplug the washing machine.
- Turn off the household water supply.
- Disconnect the inlet hoses carefully.
- Place a towel or container underneath to catch remaining water.
- Inspect the accessible mesh screens.
- If permitted by the manufacturer, clean the screens gently with a soft brush and mild soap and water.
Do not forcefully remove fixed screens or damage their seating.
For additional manufacturer guidance, read Maytag’s instructions for checking washer fill hoses.
Check the Drain Hose Installation
A washing machine that fills and drains at the same time may have an incorrectly installed drain hose.
An improperly positioned drain hose can cause siphoning, making it appear that the appliance is not filling correctly.
Follow the installation instructions for your exact model before assuming that the inlet valve is defective.
Tools and Materials Needed for Washing Machine Valve Replacement
If the diagnosis confirms an inlet valve problem and the manufacturer permits the repair, gather the appropriate equipment.
| Tool or material | Purpose |
|---|---|
| Compatible replacement inlet valve | Replaces the faulty component |
| Screwdriver | Removes the required access panel |
| Pliers | Helps release appropriate hose clamps |
| Towels | Absorbs remaining water |
| Small container | Collects water from disconnected hoses |
| Flashlight | Improves visibility |
| Work gloves | Helps protect hands |
The exact tools depend on the washer’s design.
Most importantly, obtain a replacement valve compatible with the complete model number of your washing machine.
How to Replace a Washing Machine Water Inlet Valve: 7 General Steps
The following steps describe a typical replacement procedure. They are not universal instructions for every washer.
Some front-load and top-load models require different access methods, and certain repairs should only be performed by qualified technicians.
Step 1: Disconnect Electrical Power and Water
Safety must come before any appliance repair.
Unplug the washing machine from the electrical outlet and turn off the household water supply valves.
Never open the appliance cabinet while it is connected to electrical power.
If the washer is hardwired or you cannot safely isolate its electrical supply, contact a qualified professional.
Step 2: Disconnect the Water Inlet Hoses
After closing the supply valves, disconnect the hot and cold inlet hoses from the washing machine.
Keep a towel and container nearby because a small amount of water may remain inside the hoses.
Label the hoses if necessary so they can be reconnected to the correct ports.
Step 3: Access the Inlet Valve Assembly
Locate the water inlet valve according to the manufacturer’s service instructions.
On many models, it is positioned near the rear of the appliance, where the external water hoses connect.
The access panel may be at the top or rear of the washer.
Do not force the cabinet open. Different models use different clips, fasteners, and panel arrangements.
Step 4: Document and Disconnect the Electrical Connections
Before disconnecting anything, take clear photographs of the existing electrical connections.
This can help prevent wiring mistakes during reassembly.
Disconnect the electrical connectors only after confirming that power has been isolated.
If connectors are burned, damaged, or corroded, stop and have the wiring inspected.
Step 5: Remove the Old Inlet Valve
Depending on the model, the valve may be secured with screws, brackets, or retaining clips.
Remove the mounting hardware and carefully disconnect the internal water hoses using the appropriate tools.
Keep track of the hose positions, clamps, and electrical connections.
Do not pull aggressively on rubber hoses or wiring.
Step 6: Install the Compatible Replacement Valve
Compare the replacement component with the original valve before installation.
Check:
- Manufacturer-approved part number.
- Number of water outlets.
- Electrical connector configuration.
- Mounting points.
- Hose connection positions.
- Required electrical specifications.
Install the new component in the correct orientation.
Reconnect the internal hoses, clamps, mounting hardware, and electrical connectors according to the model-specific service instructions.
Never modify connectors or wiring to make an incompatible component fit.
Step 7: Reassemble and Check for Leaks
Once the replacement is complete, reinstall the access panel and reconnect the water inlet hoses.
Restore the water supply carefully and inspect every disturbed connection.
Only restore electrical power after the appliance has been fully reassembled and the area is dry.
Run an appropriate test cycle according to the manufacturer’s instructions.
Check for leaks during filling and confirm that the washer stops receiving water when required.
If you notice leaking, unusual noises, electrical problems, or unexpected filling behavior, stop the appliance and seek professional assistance.
How Much Does Washing Machine Valve Replacement Cost?
The cost of washing machine valve replacement varies depending on the appliance brand, model, replacement part, and labor requirements.
There is no single price that applies to every washing machine.
Several factors influence the total repair cost:
Replacement part: Different models use different inlet valve assemblies. Multi-outlet assemblies may cost more than simpler components.
Appliance brand: Compatible parts and availability vary between manufacturers.
Labor: A professional repair may include diagnostic time, labor, transportation, and additional service charges.
Additional damage: Damaged hoses, electrical connectors, or control components may require separate repairs.
Before approving a repair, ask for an itemized estimate that separates the replacement part, labor, diagnostic fee, and any additional work.
Compare the repair estimate with the age and overall condition of the washing machine before deciding whether repair or replacement makes more financial sense.
Avoid purchasing a valve based only on appearance or a generic product description. Model compatibility is more important than choosing the cheapest available part.
DIY Replacement vs. Hiring a Professional
Not every washing machine valve replacement is suitable for a beginner.
A simple repair may be manageable for someone with appropriate appliance-repair experience, but the work involves water connections, electrical components, and internal appliance parts.
| Consideration | DIY repair | Professional repair |
|---|---|---|
| Initial expense | May be lower | Usually includes labor |
| Technical knowledge | Required | Technician provides expertise |
| Part compatibility | Must be checked carefully | Technician can identify suitable parts |
| Electrical safety | User must manage safely | Qualified technician handles the work |
| Diagnosis | Risk of misidentifying the problem | Professional diagnostic assessment |
| Warranty considerations | Unauthorized work may affect coverage | Authorized service may preserve applicable coverage |
Choose professional assistance if you are unfamiliar with appliance wiring, cannot isolate power safely, discover damaged electrical components, or suspect a plumbing problem.
Always review the manufacturer’s warranty terms before opening the appliance cabinet.
How to Prevent Future Washing Machine Valve Problems
Although no maintenance routine can guarantee that a water inlet valve will never fail, a few sensible habits can help protect your washing machine.
Inspect Water Supply Hoses Regularly
Check hoses for bulging, cracking, corrosion, and loose connections.
Follow the manufacturer’s replacement recommendations. Some manufacturers recommend replacing washer fill hoses periodically; for example, Maytag advises replacing fill hoses every five years in its guidance.
Keep Inlet Screens Clean
Inspect accessible inlet screens when filling problems develop.
Remove sediment carefully using the cleaning method approved for your model.
Avoid sharp objects or excessive force.
Avoid Ignoring Small Leaks
Even a small leak can become a bigger problem if it continues unnoticed.
Inspect the rear connections occasionally, especially after moving or reconnecting the washing machine.
Turn Off Water Supply When Away for Extended Periods
Consider closing the household washing machine supply valves when leaving home for an extended period, if practical and consistent with your home’s plumbing setup.
This can reduce the risk of an unattended hose or connection leak causing water damage.
Follow Manufacturer Maintenance Instructions
Every washing machine has different maintenance requirements.
Use the correct detergent, inspect hoses, follow cleaning recommendations, and consult the owner’s manual when unusual symptoms appear.
For more laundry care advice, explore our guide on how to dry clothes without a dryer.
If you regularly manage indoor laundry in Florida’s humid climate, our guide to using a dehumidifier for air drying clothes can also help you manage excess moisture.
Frequently Asked Questions
1. How do I know if my washing machine inlet valve is bad?
Common warning signs include failure to fill, unusually slow filling, water entering when the appliance is switched off, and certain water-supply error codes. However, clogged screens, restricted hoses, and control problems can cause similar symptoms.
2. Can I replace a washing machine water inlet valve myself?
Some models allow a relatively straightforward component replacement, but the work requires proper electrical isolation, water shutoff, compatible replacement parts, and model-specific instructions. Beginners should consider professional assistance.
3. How long does washing machine valve replacement take?
The time depends on the appliance design, access requirements, and repair complexity. Some models are easier to service than others. Do not rely on a fixed repair-time estimate when planning a job.
4. Why does my washing machine keep filling when it is turned off?
A mechanically stuck inlet valve may allow water to enter even when the machine is not operating. A damaged valve should be investigated promptly. Turn off the household water supply and arrange an inspection.
5. Can a clogged inlet filter cause a washing machine not to fill?
Yes. Inlet screens trap sediment and debris. When they become blocked, water flow can slow down or stop. Inspect and clean accessible screens according to the manufacturer’s instructions before replacing the valve.
6. Are washing machine inlet valves universal?
No. Inlet valves differ in their electrical specifications, number of outlets, mounting arrangements, and hose connections. Always match the replacement part to the washing machine’s full model number.
7. Is a water inlet valve the same as a washing machine shut-off valve?
No. The water inlet valve is an electrically controlled component inside the appliance. The shut-off valve is part of the household plumbing and controls the water supply to the washer.
8. Should I replace the entire washing machine if the inlet valve fails?
Not necessarily. A compatible replacement valve may restore normal operation if the valve is the actual problem and the rest of the appliance is in good condition. Compare the complete repair estimate with the cost and condition of a replacement machine.
Final Thoughts
Washing machine valve replacement can solve certain water-filling problems, but identifying the actual cause is essential before purchasing a replacement component.
A washer that fails to fill may have a clogged inlet screen, damaged supply hose, closed household water valve, or an electrical problem rather than a defective inlet valve.
Start with basic troubleshooting, check the manufacturer’s recommendations, and confirm the correct replacement part using the appliance model number.
If you are comfortable with appliance maintenance and can safely isolate electricity and water, a model-approved replacement procedure may be an option. Otherwise, a qualified appliance repair technician can diagnose the issue and complete the work safely.
Regular inspections of hoses, connections, and accessible filters can also help you identify potential problems before they cause more serious water damage.
Always prioritize appliance safety, manufacturer instructions, and correct part compatibility over quick repairs.
1 thought on “Washing Machine Valve Replacement: 7 Easy Steps”